Technology is no longer optional for serious home growers — it’s how you stabilize yields, reduce time spent troubleshooting, and scale from a single tent to a multi-zone setup. This guide walks through the pragmatic path for adopting lights, environmental control, hydroponics, and automation so you can upgrade without overbuying.
Start with goals, space, and power
Before buying gear, clarify your objectives: target plant count, expected canopy area, harvest cadence, and monthly budget. Measure the grow space (length × width × height) so you can size lights, ventilation, and dehumidification accurately.
- Power budgeting: total the continuous draw for lights, fans, dehumidifiers, and pumps. Use the 80% rule (don’t load a circuit above 80% of its rated capacity) and consider a dedicated circuit for larger setups.
- Scale in steps: start with a core kit (tent, one LED, basic ventilation, and meters) and add automation once the environment is stable. This reduces upfront cost and gives you a baseline to tune from.
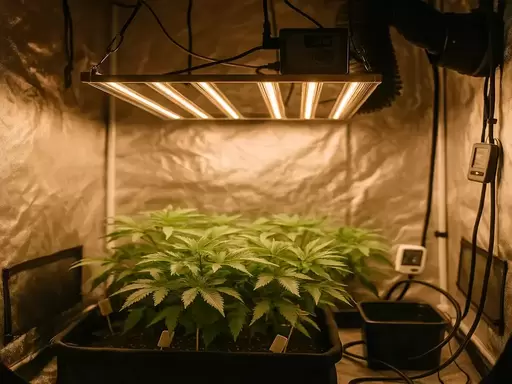
Environment control: lighting, ventilation, and filtration
Lighting and airflow are the two areas with the biggest effect on plant health and yield. Modern LEDs reduce heat and power use while offering spectrum control — but match the fixture to canopy size and layout, not just wattage.
- Light sizing: pick lights that provide even coverage over the canopy. Instead of only comparing watts, look for manufacturer PAR maps and plan for overlap so center and edges get similar intensity.
- Ventilation & filtration: calculate room volume and choose inline fans rated to exchange the air several times per hour. A simple formula: required CFM = (room volume × desired air exchanges per hour) / 60. Oversize fans and carbon filters by ~20–30% to account for ducting and filter resistance.
- Noise & placement: use flexible ducting, vibration isolation, and place noisy equipment away from living areas. Controllers and fan speed controllers help trade off noise vs. airflow during light and dark cycles.
Automation & monitoring: controllers, timers, and sensors
Move from manual checks to automated monitoring in phases: start with reliable meters, then add timers and basic controllers, and finally integrate dosing and alarms when you need round-the-clock stability.
- Essential sensors: temperature, relative humidity, and pH/EC. Add a CO2 monitor only if you plan to supplement CO2 in a sealed, high-light environment.
- Controllers & integration: a dedicated environmental controller can manage fans, humidifiers, lights, and CO2 solenoids from sensor inputs — minimizing daily intervention. Choose controllers that support alarms, logging, and manual overrides.
- Automation tips: start with a timer for lights, then move to controllers for variable fan speed and humidity control. Keep manual overrides and clearly labeled disconnects for safety.
Water systems, hydroponics, and nutrient management
Hydroponic systems and automated dosing deliver consistency but require disciplined monitoring. Invest in accurate pH and EC meters and learn how reservoir temperature affects dissolved oxygen and nutrient uptake.
- Filtration & water quality: install sediment and carbon filtration or an RO system if your source water has high TDS. Clean, consistent source water makes dosing predictable.
- Reservoir management: keep reservoirs cool and aerated. Automate top-offs or dosing when your schedule and budget allow, but always validate dosing accuracy manually during the first weeks.
- Redundancy: keep spare pumps, fittings, and one manual dosing kit on hand. Small failures compound quickly in hydro systems.
Upgrade paths and practical optimization
Adopt technology in stages so each upgrade solves a specific problem rather than adding complexity. Typical effective upgrade sequence:
- Better LED + light mapping to eliminate hot/cold spots.
- Improved ventilation and carbon filtration sized to your tent/room.
- Temperature/humidity controller with logging and alarms.
- Accurate meters (pH, EC) and a basic nutrient dosing routine.
- Automated irrigation or dosing and, finally, CO2 (only in sealed, professionally controlled environments).
Optimization tips:
- Document baseline conditions for two full cycles (temps, RH, run times, and nutrient levels) before changing multiple variables at once.
- Make incremental changes and allow plants time to respond — a single parameter change per week is a practical rule.
- Label and routinize maintenance: filter replacement, fan bearings, and reservoir cleanings prevent sudden failures.
Where to find gear and next steps
Cannavista carries the core categories most growers need — grow tents, LED fixtures, hydroponic systems, controllers, fans and filtration, water treatment, and meters — making it easy to assemble kits that fit your space and budget. Browse the full grow equipment selection at https://cannavista.com/grow-equipment-supplies/ to compare tents, controllers, and support gear.
Adopting technology thoughtfully — one bottleneck at a time — will stabilize your environment, reduce surprises, and make each subsequent upgrade more effective. If you want, provide your room dimensions, desired plant count, and budget and you’ll get a tailored parts checklist and a step-by-step commissioning plan to get your system running smoothly.
Ready to upgrade? Start by measuring your space and electrical capacity, then visit Cannavista’s grow equipment to build a focused, practical shopping list.